
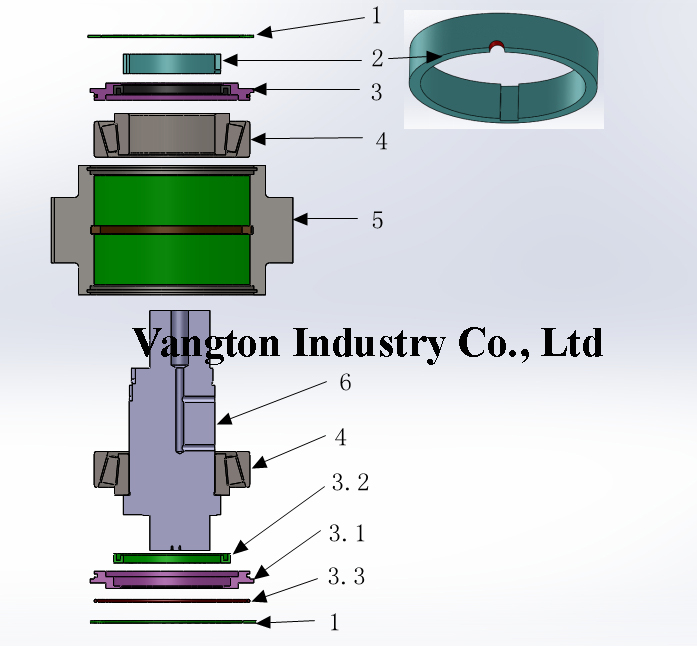
760 Pressure Roller installation Steps
- inner circlip
- pressing roller axis sleeve gasket
- pressing roller axis assembly
3.1 (pressing) roller cover
3.2 125-150-12 oil seal
3.3 o-ring (our diameter 200mm, inner diameter 4mm)
- (pressing) roller shell
- pressing roller axis
Installation steps
- Install 2 of bearing (4) covers in roller shell (5), pull them to the end.
- Heating the bearing to 95℃, fix one bearing inner part on pressing roller axis (6), scribble as more as possible high temperature resistant lithium base grease (more than 200 ℃) onto the outside of the bearing.
- Put the roller shell (which already has axis cover) on the installed bearing vertically, scribble some high temperature resistant lithium base grease, heat and install the other roller axis as same as step 2 and 3.
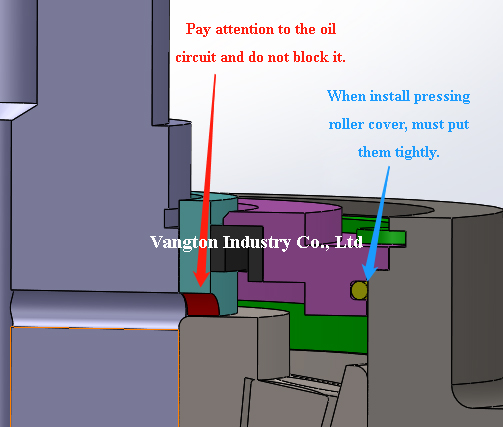
- Put pressing roller axis sleeve gasket (2) on the pressing roller, fix the blocks, align the oil hole. Put pressing roller cover assembly on the sleeve gasket tightly to the end, then put on circlip. After this, if still feels it very easy to press this part down – means the gap between o-ring and roller shell is too big. To solving this problem can wrap a few circles of ptfe tape.
- Put on thrust washer, lock the nuts (the roller shell and roller shell axis can be easily turned by hand, if too tight the bearing will be easily damaged).
- Turnover and install the other pressing roller cover assembly.
- When start normal daily production, the gap of roller bearing should be checked every two days. Try to shake the pressing rollers by hand, and confirm if they can be shaken. If yes – should adjust the gap of roller bearing in time. Check the bearing every 2 days will protect bearing and make the spare parts getting a long service life.


Leave a Reply
Want to join the discussion?Feel free to contribute!